Showing posts with label recipe. Show all posts

Monday, November 1, 2010

Happy Halloween!

Here's some pictures of my pumpkin for this year...


We had our annual bonfire at the neighbors house last night. Hot dogs roasted over the fire, s'mores, lot of jack-o-lanterns, and just a few trick-or-treaters.

I thought it was time for a few fall recipes. Here's a delicious pumpkin butter recipe that is great on biscuits or toast.

Pumpkin Butter
2 (15-ounce) cans of canned pumpkin or about 4 cups of fresh-- I used fresh
1 1/4 cups maple syrup
1/2 cup apple juice
2 Tablespoons lemon juice
1 teaspoon ground ginger -- I'm not a fan of ginger so I left this out
1/2 teaspoon cinnamon
1/2 teaspoon nutmeg
1/4 teaspoon salt

Put all the ingredients in a crock pot and cook on low for 5-6 hours. I would probably do 6-7 to make it a bit thicker next time. Stays good in the fridge for 1-2 weeks and then you can freeze whatever you haven't eaten yet.

Adapted from: http://bakedbree.com/slow-cooker-pumpkin-butter


Another great fall recipe is Apple Cinnamon Bread.

Apple Cinnamon Bread (http://twopeasandtheirpod.com/apple-cinnamon-bread/)
1 1/2 cups all purpose flour
1 teaspoon baking soda
1/2 teaspoon salt
2 teaspoons cinnamon
1/2 teaspoon all spice
1/4 teaspoon ground cloves
2 large eggs
1/4 cup canola oil
1/4 cup applesauce
1 teaspoon vanilla
1 cup granulated sugar
2 cups chopped apples, skin removed

Topping:
2 tablespoons brown sugar
1 tablespoon sugar
1 teaspoon cinnamon

1. Preheat the oven to 350 degrees F. Spray an 8 by 4 loaf pan with cooking spray and set aside.

2. In a medium bowl, whisk together flour, baking soda, salt, cinnamon, all spice, and cloves. Set aside.

3. In the bowl of a stand mixer, add the eggs and beat on medium speed for about 30 seconds. Add in oil, applesauce, and vanilla and mix until smooth. Next, add the sugar and mix until well combined.

4. Slowly add in the flour mixture and mix until flour is barely combined. Gently fold in the apple chunks. Pour batter into prepared loaf pan.


5. In a small bowl, mix together brown sugar, sugar, and cinnamon. Sprinkle over the batter in the loaf pan.

Bake for 50-55 minutes, or until loaf is golden and a toothpick comes out clean.

6. Cool bread in pan for 10 minutes. Loosen sides and remove from pan. Cool completely on a wire rack before slicing.


ENJOY!

Monday, September 13, 2010

Sweet Potatoes

So things have been a little hectic at work lately so I haven't had time to blog...sorry! But we have had some excitement in the garden since my last posting...Sweet Potatoes are ready!


My dad check on them last week and was happy with what he saw so we decided to dig them all up.


This was our first attempt at sweet potatoes and I'd say we'll definitely be planting them again next year! Some of our potatoes were a good two pounds.


We made a delicious sweet potato casserole that night (http://southernfood.about.com/od/sidedishcasseroles/r/bl90911u.htm), which should be classified as a dessert and not a vegetable! And then I had a baked sweet potato the following night. Any suggestions about what I should do with them this week?

Tuesday, August 3, 2010

Tomatoes!

It's tomato season! We've actually had a great crop this year. We tried a variety of new plants...some with great success and other we won't be planting again. We really like the new type of cherry tomatoes we planted that actually look like tear drops. There will be multiple plants of that variety next year!

So what do you do with tons of tomatoes? Make SALSA!

First, pick your recipe. We use a mix from Mrs. Waggs. It's not my favorite because I think it has a hint of chili powder flavor but everyone else loves it.


Next, you want to boil the tomatoes for about 3 minutes. Just long enough that the skin starts to crack. Then immediately place them into ice cold water. Finally, remove the skins from the tomatoes.


Chop your tomatoes into whatever size you'd like.


Then add the seasoning packet (or you could just use your own seasons), fresh peppers and onions and boil for 10 minutes.


Once it's done cooking, carefully place it into your storage contains. We used Ball jars just because we had them handy. You can actually can salsa but we made just enough to eat this time.


Other ideas for tomatoes:
-Cucumber tomato salad
-Pizza sauce
-Spaghetti sauce
-eat plan with a dash of salt!

What do you do with your fresh tomatoes?

Thursday, July 22, 2010

Ooh La La

I made a French dessert last night that was absolutely delicious! I found the recipe on a blog I follow, Confabulation in the Kitchen (http://shallwecook.blogspot.com/2010/07/berry-cherry-clafoutis.html). It's called Berry Cherry Clafoutis. Both the berries I used were freshly picked by me and my dad! The original recipe is on that blog but here is the recipe with my changes:

Ingredients
1 1/2 cups fresh blueberries
1 cup fresh blackberries
3 large eggs
2/3 cup sugar
1/2 cup sifted, all-purpose flour
1 cup skim milk
1/8 teaspoon salt
1 teaspoon vanilla extract
2 teaspoons almond extract

Directions
1. Preheat oven to 350 degrees. Prepare a 9-inch, round baking dish with nonstick spray, then toss in blueberries and blackberries.


2. In a large bowl, whisk the eggs, sugar, flour and salt until well-combined.
3. Add milk, vanilla, and almond extract to egg mixture and whisk well. Pour wet ingredients over fruit.


4. Bake 45 to 50 minutes, or until dessert puffs and a tester inserted into the center comes out clean. Center will deflate as the dish cools on a wire rack. Serve warm or at room temperature.


It has a great custard texture and the almond extract gives it great flavor! Plus the berries were so juicy when eaten warm! I will definitely be making this again and again!


Okay, it's also time for another quote of the day from my mom! This weekend we were showing the garden to some friends. My mom was pointing out one of our tomato plants, which has odd shaped fruit growing on it. She told our guests that she thinks the plant has a "generic disorder." Um, mom...I think you mean genetic! :)

Also, here's a few pictures of what I saw hanging out on my front porch when I left for work this morning:

Wednesday, July 7, 2010

Happy Birthday America!

Happy (late) Fourth of July!

I hope everyone enjoyed the holiday! I had a nice 4-day weekend which I spent playing outside and relaxing with family and friends. On the Forth, we went to a cookout with some friends who were in town for the weekend. I decided to make a yummy, light, patriotic treat. I saw this idea online somewhere and thought it would be perfect....Red, White, and Blue Strawberries


First you need to clean and dry your strawberries (if they're wet, the chocolate won't stick correctly).


Then you need to melt your white chocolate. I used little baking chips and melted them in a bowl in the microwave. Make sure you stop every 20-30 seconds to stir the chocolate. Also, make sure you don't over cook it!


Next, dip the strawberries into the chocolate so that it covers 2/3 of the berry. Then let some of the excess chocolate drip off (or if you're impatient like me, you can scrape some of it off with a spoon...too much chocolate makes the sprinkles look weird). After you've dipped the strawberries in chocolate, dip the bottom 1/3 in blue sanding sugar.


Finally, let the strawberries dry on foil and then ENJOY! I would recommend making these the same day that you plan to serve them. Since the strawberries sweat, the blue sugar starts to run and can cause a mess...although their still good!


And as a side note, here's a picture of my Aunt Mary and my dad picking transparent apples at a friends house. My Aunt Mary was complaining because there were no pictures of her on here...now there is! She made some delicious applesauce with these apples!

Monday, June 21, 2010

Hawaiian Strawberry Pie

Happy Father's Day to all the dads out there! We had a wonderful cookout with my dad last night to celebrate. I was responsible for bringing the dessert so I thought I'd use all the wonderful berries I've picked lately to make a new recipe I found.

I saw the recipe for Hawaiian Strawberry pie on http://joelens.blogspot.com/ last week. I immediately thought it would be a great recipe for the cookout...I was right, it was a big hit! Yummy, and nice and light for a HOT afternoon. Here's the recipe:

Hawaiian Strawberry Pie
recipe inspired by Baker's Square/Village Inn Restaurant

1 (15oz) can crushed pineapple, drained
1 (8oz) package cream cheese, softened
1/2 cup sugar + 2 tablespoons
2 cups whipped cream (homemade or store bought)--(I used cool whip)
1 9-inch baked pie crust (homemade or store bought)--(I used store bought graham cracker crust)
1 pint fresh strawberries, washed, hulled and roughly chopped
1/4 cup coconut flakes, toasted
1/4 cup chopped pecans, toasted--(I didn't use the pecans)

Place pineapple in a sieve and smash it to a pulp to release the juice. Reserve juice if desired but you won't need it for the rest of the recipe. Transfer the pineapple pulp to a large bowl.

Combine the pineapple, cream cheese and 1/2 cup sugar in a large bowl. Fold in 1 cup of whipped cream.

Transfer the pineapple cream cheese filling to the baked and cooled pie crust. Spread evenly to fill the crust. Cover with plastic wrap and chill for at least 2 hours.

While pie is chilling, combine the strawberries and 2 tablespoons of sugar; set aside to macerate to release the juices. Drain the juices and set aside just before serving.

Just before serving the pie, top the pineapple cream cheese filling with the macerated and drained strawberries. Sprinkle toasted coconut flakes and chopped pecans over the top for garnish. Pipe the remaining 1 cup of whipped cream on the edge as a border and serve

Friday, June 18, 2010

Summer Lovin'


Okay, I know I just said I love strawberries (and I do) but my one true love is BLUEBERRIES! They are just the most delicious little things! I could eat them by the pounds...and I almost did last night!

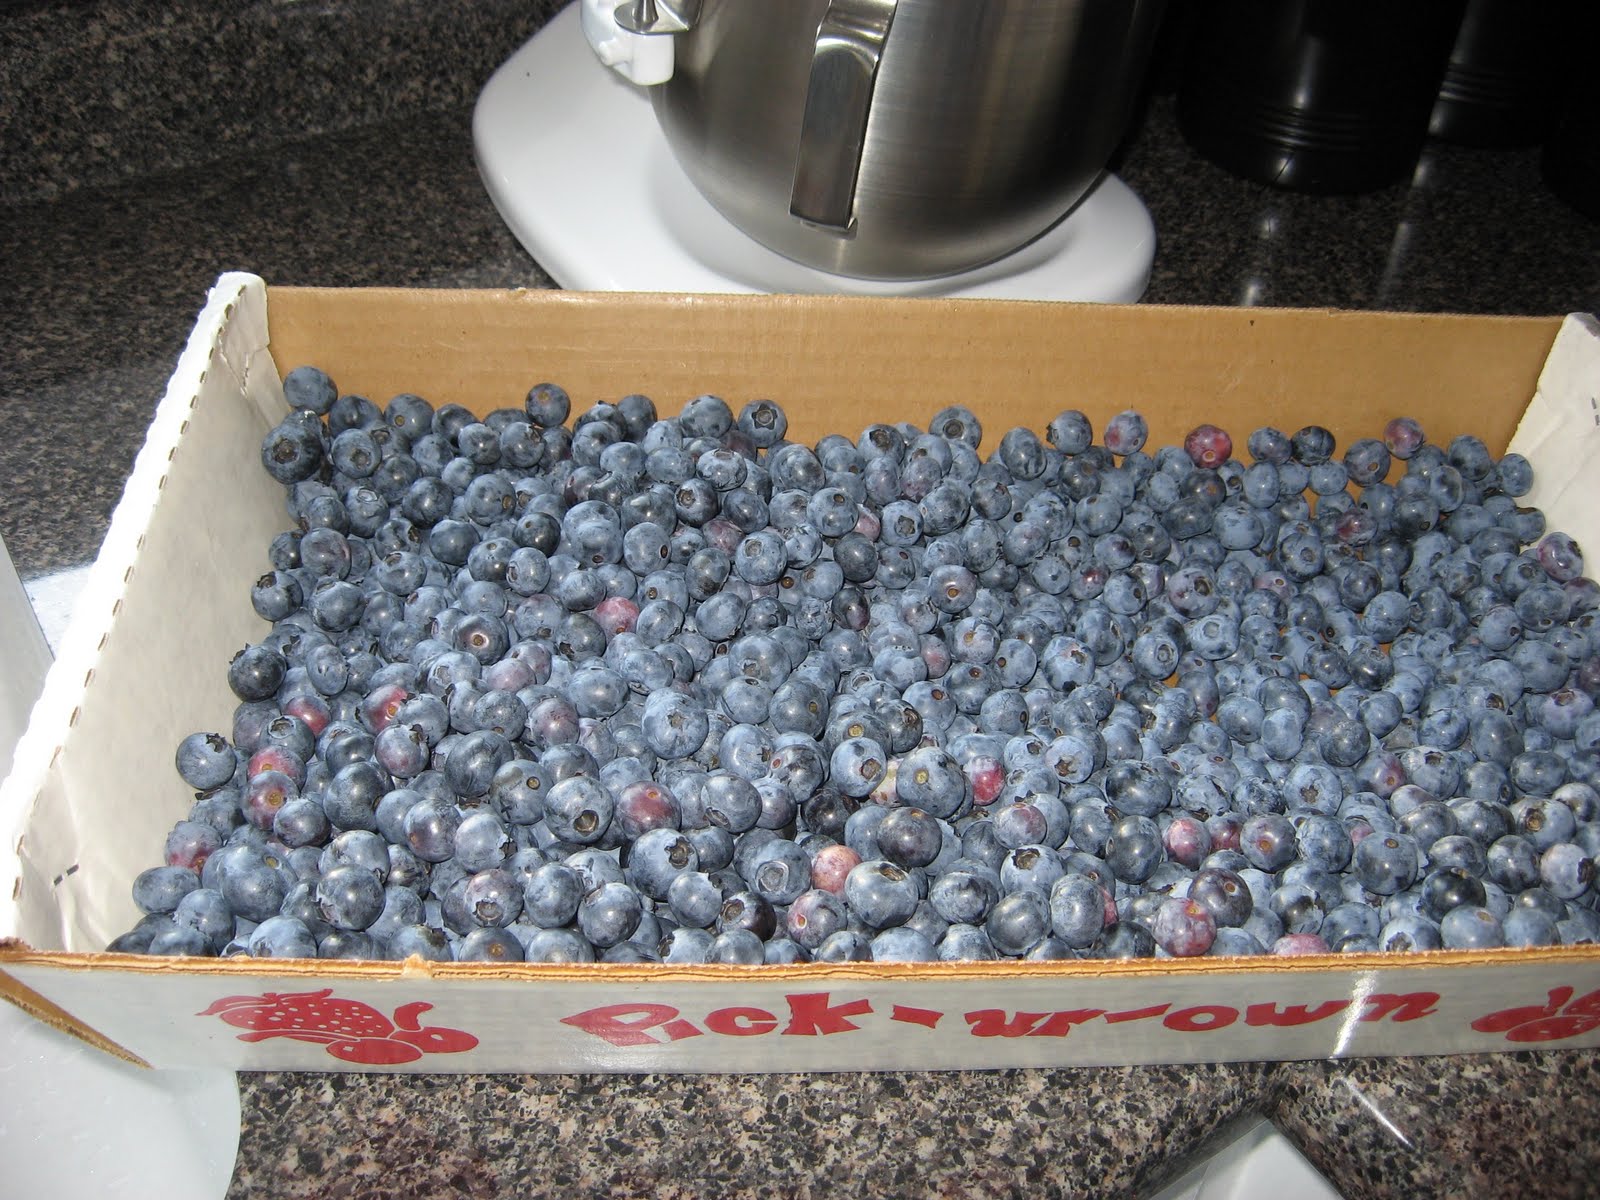
Luckily there are a lot of local farms that grow these little treats! You can find them at local farmer's markets around the middle/end of June and early July. It's been so hot here this spring that they're ready a bit early. However, if you want to do a little work for your food you can find a local you-pick farm and go pick your own. I spent an hour last night picking over 8 pounds of blueberries. I was in heaven!

This is about half of what I picked!

If you get home and realize some of your berries aren't as ripe as you'd like them, you can put them in a tray and leave them out for a day. The blueberries will ripen up very nicely and taste just as sweet as the others.


I freeze the blueberries the same way I do the strawberries: clean, freeze individually on a tray, then put in a freezer bag to save for the winter. I froze 2 big bags worth last night! That should provide a lot of yummy pancakes, muffins, and treats for my cereal over the winter months.

However, I do really like to bake with them while they are fresh. My favorite recipe came from my Aunt Mary (not sure where she got it) and it's called Alabama Blueberry Bread. Enjoy!

3 Cups flour
1 tsp. salt
1 tsp. baking soda
1-2 TB. ground CINNAMON (I usually use almost 3!)
2 Cups sugar
1 tsp. GROUND NUTMEG (optional...I don't use it)
3 eggs, well beaten
11/4 Cups canola oil
2 pints of blueberries (mash about 1 Cup of these)
2 tsp. LEMON EXTRACT
1 Cup chopped nuts, optional (I don't usually use nuts!)

Preheat oven to 350°. Grease 2 large (9 inch) loaf pans. Mix 1/4 cup of the sugar and half of the CINNAMON. Sprinkle pan and top of bread with this mixture (I do this now with all of my fruit bread recipes...yum!). Place flour, salt, baking soda, sugar, NUTMEG and the remaining CINNAMON in a large bowl. Make a well in center of dry ingredients. Add eggs, oil, and LEMON EXTRACT. Stir until dry ingredients are moistened. Stir in blueberries and nuts. Mashing some of the blueberries gives the bread a nice blueberry color. If you use frozen blueberries, make sure they are frozen plain and not sugared. Divide batter between two loaf pans. Bake 1 hour.

To remove the loaves from their pans without losing the sugary topping, try this trick. Double a sheet of aluminum foil, cut it to half the width of the pan and place it in the greased bread pan, up and over the edges, then pour in the batter. This will give you a handy way to lift the bread right out of the pan, as in the photo below. (I usually fold the foil in half again so the bread gets as much of the sugary stuff on it as possible!)

This is better if not eaten until the next day (although I usually can't wait that long!). Keep refrigerated.

Yield: 2 loaves.
Prep. time: 10 minutes.
Baking time: 1 hour