Wednesday, June 30, 2010

Ummm....Taters!

Growing up, my family (dad, mom, me, and my younger brother, Eric) always vacationed with my Aunt and Uncle and their kids. We always found a quiet little island off the Carolinas or in the Gulf where we could collect sharks teeth, ride bikes, play cards, eat, and have a great time! Now my brother and my cousin, Andrew, are two peas in a pod! They are goofy, outgoing, witty, sometimes annoying boys! There was one particular vacation when I was in high school or early college where those two were in especially rare form! Their quick wit and goofiness was pushing my Uncle Jim to the edge (Oh Uncle Jim...there are no words to describe him!). I don't know how it started or why it started, but the entire week (and still to this day when potatoes are eaten) those two ran around giggling about taters! "Ummm taters" is all I remember from that trip. So this blog entry is dedicated to Eric and Andrew...ummm TATERS!

Here's a picture of some of us (there are about 5 people missing from this trip) during our Grand Canyon adventure a few years ago.


So, we dug potatoes last night. In April, we planted red, white, and Yukon gold potatoes. You plant potatoes in the spring by getting old potatoes that have started to grow eyes (the white viney things). You can cut each eye out separately, along with a chunk of the potato, and plant the eye.

Come summer time, the potato plant will get large and flower, while below lots of potatoes are waiting. We dug two rows last night and here's what we got:

That's a lot of potatoes considering we still have five more rows to dig!

When you're digging potatoes, it's easiest to use a pitch fork. But be careful not to stab the potatoes! If you do injure one, make sure you eat it soon...if not, it may rot! Use the pitch fork to lift the plant from the ground and flip it over. Hopefully you'll find lots of taters underneath.


Keep the potatoes dry and cool and they should last for a while. We usually store ours in the basement.

Here's a picture of our biggest catch:

On the right is a normal sized red potato...on the left is the queen bee of red potatoes!

I promise to add some potato recipes soon!

Finally...another quote from Deb! Although this isn't really a quote, it's more of a disgusting statement:
We were at my parents having dinner, bring the food to the table about to eat, when my mom calls my brother. He was out of town and she had been dog-sitting. She proceeded to tell him that Knuckles (the dog) had "runny poopie" that day. Really mom!!??!! Great dinner conversation!

Friday, June 25, 2010

Garden update...

Here's what's happening this week:

Green beans are almost ready! That means I'll be spending a LOT of time in the coming weeks picking beans...not fun! (If you look really closely, you'll see a small, little green bean!)


The first batch of beets are done. My mammaw always pickles them for us. I still think they taste like dirt but my Aunt Mary loves them!


My parents had some broccoli this week...more coming very soon!


Corn is coming up nicely!


The first onions and yellow squash are done...I'm making a stir fry this weekend!

Monday, June 21, 2010

Hawaiian Strawberry Pie

Happy Father's Day to all the dads out there! We had a wonderful cookout with my dad last night to celebrate. I was responsible for bringing the dessert so I thought I'd use all the wonderful berries I've picked lately to make a new recipe I found.

I saw the recipe for Hawaiian Strawberry pie on http://joelens.blogspot.com/ last week. I immediately thought it would be a great recipe for the cookout...I was right, it was a big hit! Yummy, and nice and light for a HOT afternoon. Here's the recipe:

Hawaiian Strawberry Pie
recipe inspired by Baker's Square/Village Inn Restaurant

1 (15oz) can crushed pineapple, drained
1 (8oz) package cream cheese, softened
1/2 cup sugar + 2 tablespoons
2 cups whipped cream (homemade or store bought)--(I used cool whip)
1 9-inch baked pie crust (homemade or store bought)--(I used store bought graham cracker crust)
1 pint fresh strawberries, washed, hulled and roughly chopped
1/4 cup coconut flakes, toasted
1/4 cup chopped pecans, toasted--(I didn't use the pecans)

Place pineapple in a sieve and smash it to a pulp to release the juice. Reserve juice if desired but you won't need it for the rest of the recipe. Transfer the pineapple pulp to a large bowl.

Combine the pineapple, cream cheese and 1/2 cup sugar in a large bowl. Fold in 1 cup of whipped cream.

Transfer the pineapple cream cheese filling to the baked and cooled pie crust. Spread evenly to fill the crust. Cover with plastic wrap and chill for at least 2 hours.

While pie is chilling, combine the strawberries and 2 tablespoons of sugar; set aside to macerate to release the juices. Drain the juices and set aside just before serving.

Just before serving the pie, top the pineapple cream cheese filling with the macerated and drained strawberries. Sprinkle toasted coconut flakes and chopped pecans over the top for garnish. Pipe the remaining 1 cup of whipped cream on the edge as a border and serve

Friday, June 18, 2010

Summer Lovin'


Okay, I know I just said I love strawberries (and I do) but my one true love is BLUEBERRIES! They are just the most delicious little things! I could eat them by the pounds...and I almost did last night!

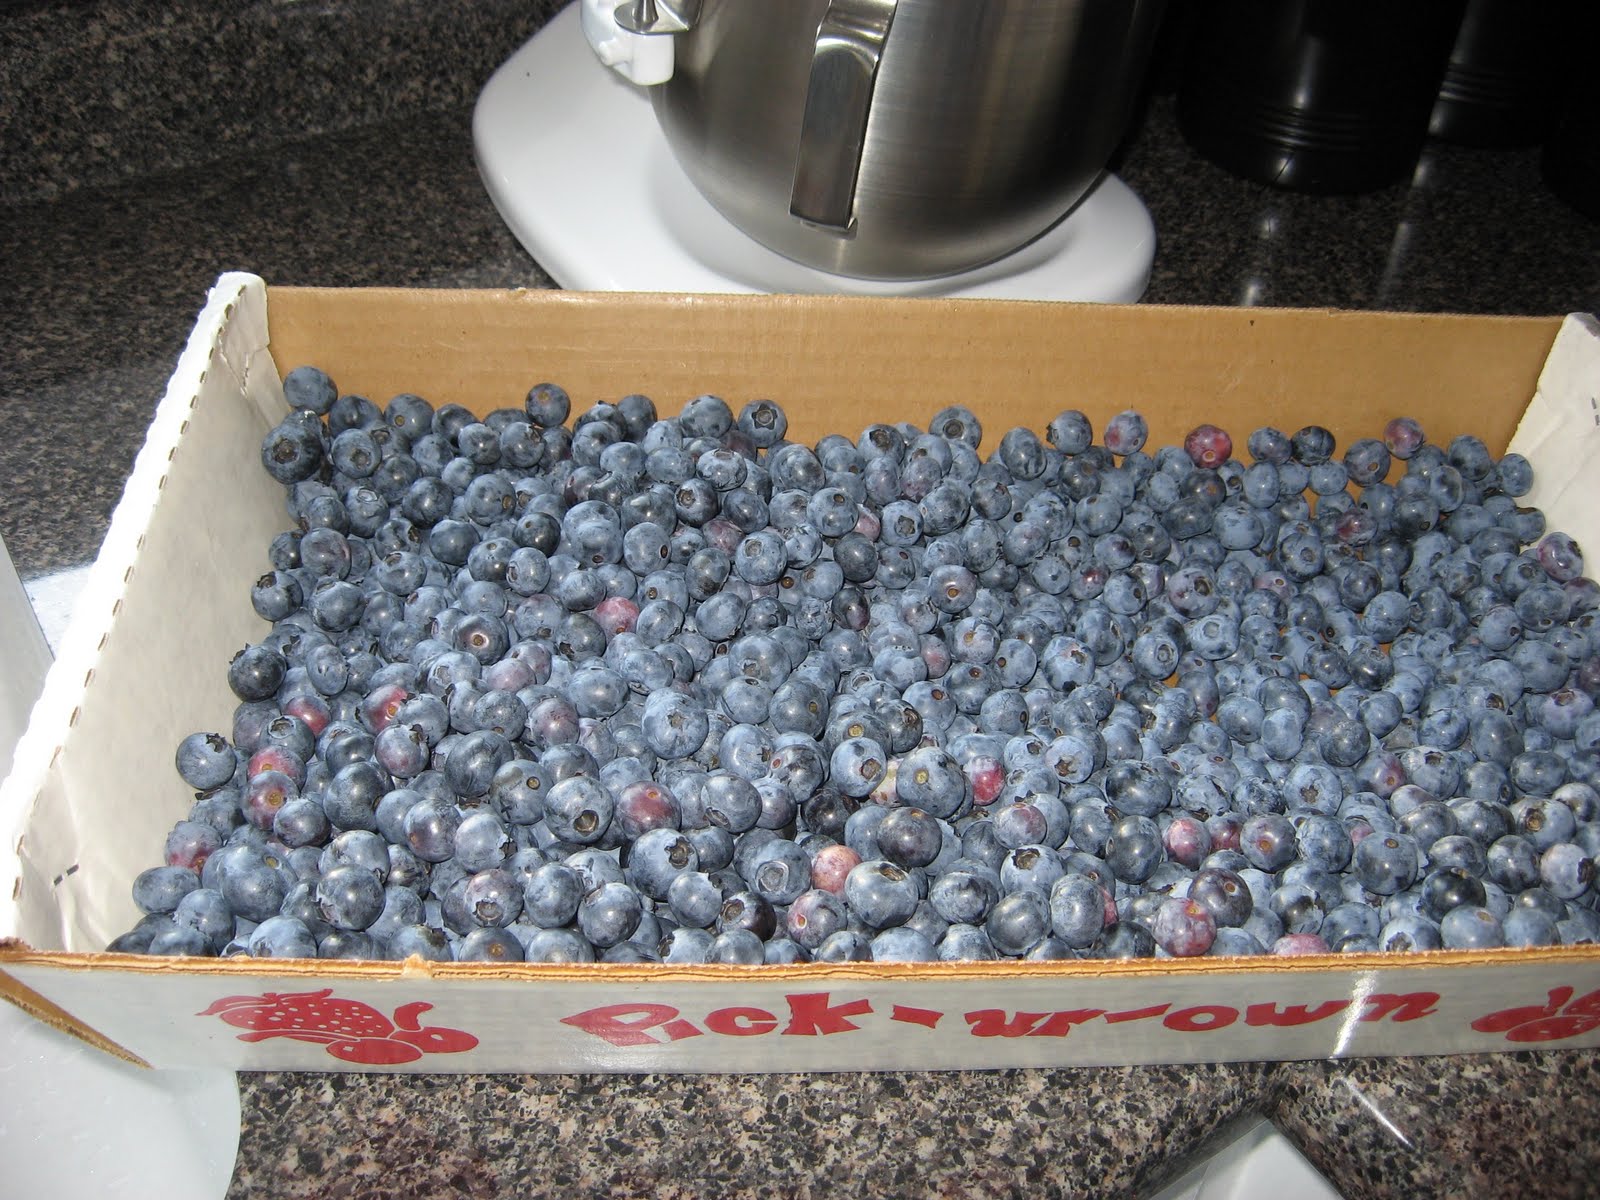
Luckily there are a lot of local farms that grow these little treats! You can find them at local farmer's markets around the middle/end of June and early July. It's been so hot here this spring that they're ready a bit early. However, if you want to do a little work for your food you can find a local you-pick farm and go pick your own. I spent an hour last night picking over 8 pounds of blueberries. I was in heaven!

This is about half of what I picked!

If you get home and realize some of your berries aren't as ripe as you'd like them, you can put them in a tray and leave them out for a day. The blueberries will ripen up very nicely and taste just as sweet as the others.


I freeze the blueberries the same way I do the strawberries: clean, freeze individually on a tray, then put in a freezer bag to save for the winter. I froze 2 big bags worth last night! That should provide a lot of yummy pancakes, muffins, and treats for my cereal over the winter months.

However, I do really like to bake with them while they are fresh. My favorite recipe came from my Aunt Mary (not sure where she got it) and it's called Alabama Blueberry Bread. Enjoy!

3 Cups flour
1 tsp. salt
1 tsp. baking soda
1-2 TB. ground CINNAMON (I usually use almost 3!)
2 Cups sugar
1 tsp. GROUND NUTMEG (optional...I don't use it)
3 eggs, well beaten
11/4 Cups canola oil
2 pints of blueberries (mash about 1 Cup of these)
2 tsp. LEMON EXTRACT
1 Cup chopped nuts, optional (I don't usually use nuts!)

Preheat oven to 350°. Grease 2 large (9 inch) loaf pans. Mix 1/4 cup of the sugar and half of the CINNAMON. Sprinkle pan and top of bread with this mixture (I do this now with all of my fruit bread recipes...yum!). Place flour, salt, baking soda, sugar, NUTMEG and the remaining CINNAMON in a large bowl. Make a well in center of dry ingredients. Add eggs, oil, and LEMON EXTRACT. Stir until dry ingredients are moistened. Stir in blueberries and nuts. Mashing some of the blueberries gives the bread a nice blueberry color. If you use frozen blueberries, make sure they are frozen plain and not sugared. Divide batter between two loaf pans. Bake 1 hour.

To remove the loaves from their pans without losing the sugary topping, try this trick. Double a sheet of aluminum foil, cut it to half the width of the pan and place it in the greased bread pan, up and over the edges, then pour in the batter. This will give you a handy way to lift the bread right out of the pan, as in the photo below. (I usually fold the foil in half again so the bread gets as much of the sugary stuff on it as possible!)

This is better if not eaten until the next day (although I usually can't wait that long!). Keep refrigerated.

Yield: 2 loaves.
Prep. time: 10 minutes.
Baking time: 1 hour

Thursday, June 17, 2010

Pretty Flowers

I have these amazing lilies in my backyard that I wanted to share with you. I used to have six of them but some little creature got four of them this winter. Luckily I still have two, one red and one orange. I've never seen a lily this tall with flowers this big. Does anyone know what type of lily they are? I'd love to get more.


Monday, June 14, 2010

Straaaawberries!!!!!!!!


I love strawberry season and hate that it lasts such a short time! Strawberries are a late spring fruit and depending on the weather the season can be very short! It's about the end of strawberry season for those of us in Indianapolis. Plus, we had a LOT of rain lately and it seems like the few strawberries that are left are rotting on the vine :(

We don't grow our own strawberries. If I remember correctly, we tried a few times when I was much younger and had little success. I rely on the local farmer's market to provide me with these delicious treats.

I know not everyone has the time, energy, land, or growing ability to have their own garden. Just because you don't garden doesn't mean you can't enjoy fresh, local, in season produce. No matter where you live, I'm sure you can find a farmer's market close by. There are tons of them in the Indianapolis area on a variety of days, times, and all around town. I personally like the Broad Ripple farmer's market the best. It's held on Saturdays from 8-12. I think there is best selection at this one. Even though it's about 30 minutes from my house, it's totally work the drive!

This week my mission was to find strawberries, buy them in bulk and freeze them for the winter months. Unfortunately, I had to go to a different farmer's market this week (stupid rain storm on Saturday morning!) and my strawberry selection was minimal. However, I was able to buy and freeze some. Here's what I do:

Buy yummy strawberries, bring them home to rinse and cut the stems off.


Then I place them on a pan and freeze them for about 30 minutes. This allows each strawberry to freeze separately so they don't all stick together in the bag.


After they've frozen, I place them in a freezer bag and save them for the winter when I'm craving fresh fruit.


Usually around February I'm dying for good fresh fruit. This is when I pull out the frozen strawberries and use them in a healthy, organic smoothie. I combine the frozen strawberries, organic yogurt (any flavor, although I like strawberry, peach, or vanilla), and organic milk. Blend and enjoy! It's so simple and delicious! Sometimes I'll add a little honey to make it sweet or even some cinnamon for added flavor.

If you thaw the strawberries they will be mushy, not so tasty! So I also use them in baking. Strawberry bread and muffins are great treats!

Thursday, June 10, 2010

Weed Prevention 101

Here's a few quick tips about preventing those annoying weeds in your garden. I already told you how to get rid of them once they show up (tiller, hoe, or my favorite...pull them by hand) but how can you stop them from showing their ugly little faces in the first place? Here's one trick we use in our garden


We use black tarps made of this cloth/plastic material. You can find it at your local hardware store. It comes in a big roll. We lay it down around our squash plants and cut holes around the plants. It's a great way to stop the weeds from growing around the viney plants. This year we're also going to put it around our pumpkin and cantaloupe plants.

I've also heard that you can put wet newspaper down around your plants and it will prevent weeds while it slowly biodegrades. Has anyone tried this? I think it would be very time consuming for our larger garden but it might be a nice alternative for a smaller space.

Another question for my readers (if there are any!?!?)....what in the world is this?


We found three of them in our radish patch. They look like carrots on the bottom but the greens are different. I googled purple carrot, purple radish, white beets, and nothing matches. Any ideas?

Finally, another quote from my mom:
We were picking more peas last night (so many!!!) and in order to reach all of them you have to lean over the onions. Our onion stems/greens are already over a foot high, which means they're hard to ignore. As we are about to finish picking, my mom stops, looks up with a weird look on her face and says,
"I smell onion?"

I wonder why!!!!